read more posts by
Kristen
A Family of Zoo Enthusiasts
For those that know me, it comes as no surprise that we are zoo enthusiasts. Borderline fanatics. I have always loved to see the animals, go behind the scenes, and explore the different facilities and what it takes to take care of all of the animals in their care.
Way before the girls were around, I would frequent the Houston Zoo on nice weekend afternoons, support their social calendar (Feast with the Beasts!), and even did a penguin encounter behind the scenes at Moody Gardens in Galveston. On trips, I would make a point to visit the local zoo as part of my visit. At this point, we have been to zoos in Austin (rescue), Ft. Worth, Tulsa, Colorado Springs, and (the) San Diego.
We have even gone as far as to visit the now-infamous Tiger King on a whim while we were visiting friends in Oklahoma City. I hear you, pictures or it didn’t happen. Also note, this visit was WAY before Tiger King came out, and their horrible practices were known.
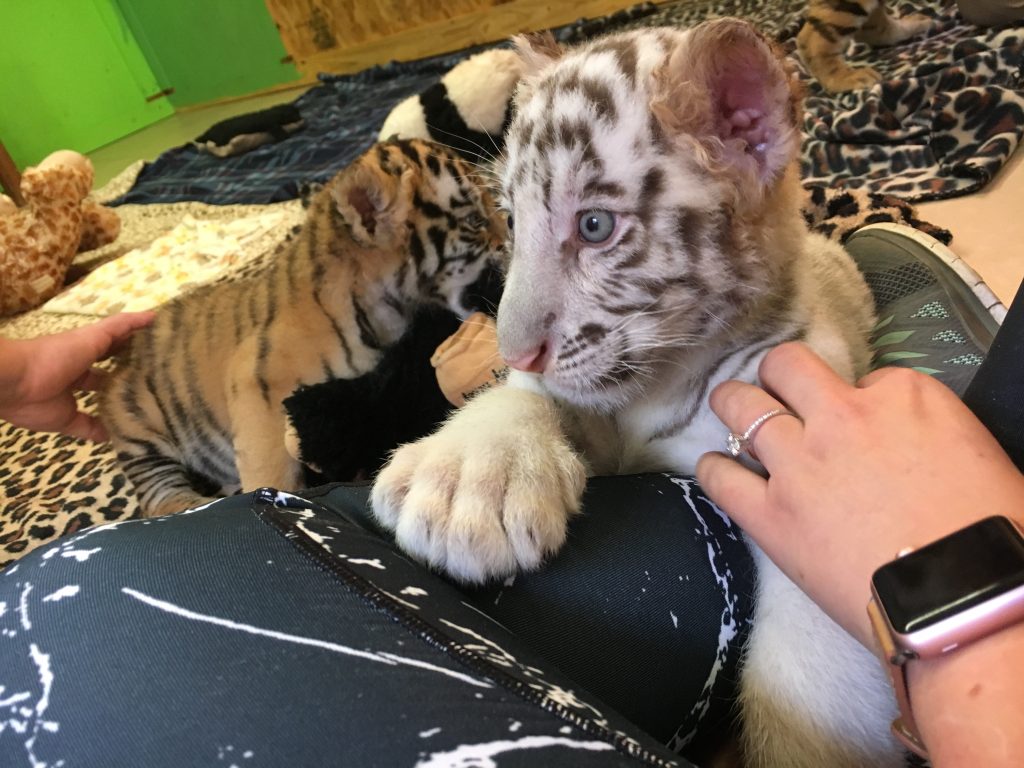
We loved meeting these baby tigers, but also realize now how terrible this place was
All that to say, I like going to the zoo.
As soon as I had our oldest, I became a member of the Denver Zoo. As my family has grown, the zoo remains a constant and it has been so fun to take the girls and watch the pure joy on their faces as they explore and see the animals.
Perfect Denver Zoo Day Itinerary: 2-3 hrs
1. Buy tickets for when it opens: I believe this is the most critical component of a successful zoo day. You get the best parking, your family is still freshly awake, the animals are most active, and, most important, the line for the carousel will be short! Tickets are still done in advance via reservation windows, but availability is typically pretty easy to come by.
2. Make a hard right: The Zoo entrance will naturally send you to the right towards the lions. Don’t deviate from this trail! Continue on towards the Animal Hosptial. There are often animals getting checked out (sometimes open surgeries), and always a zoo team member in the gallery to talk through any operations or, if there are no animals in at that time, to answer any questions you have or tell you about the animals who are coming in later!
3. Carousel and Train: The carousel at the Denver zoo cannot be beat. If you have to pick one, we ALWAYS choose the carousel, it’s gorgeous, the animals are unique and varied, and they play Disney songs throughout the ride. We cannot come to the zoo without a stop at the carousel and 90% of the time it’s running (even when it’s cold). The train, while fun, is secondary for our family. We find it isn’t running as frequently as the carousel, often gets started later in the morning so we have often already passed before it gets going, and when it IS working, brace yourself for a line. It also requires ANY rider to have a ticket whereas the carousel only requires tickets for children riders which makes the carousel much less expensive. Pro Tip: pre-buy a digital ride punch card if you can. Saves you from waiting in the ticket line.
4. Fork in the road: Once you hit the flamingos you are presented with a choice – head to the right to the primates or follow the route to the left. If you are looking to get closer to that 2 hour time frame, veer left and visit the primates another day. If you are game for more time spent at the zoo, veer right and go straight to the indoor house on the right, then circle around to the gorillas and back out to the Lorikeets.
5. Lorikeets! If the Lorikeets are open, and it isn’t crowded inside, make the stop. It’s so fun to go in to feed the colorful Lorikeet birds while they are still hungry and interested in eating (another good reason to Zoo early!). It’s also key if you have small kids that you aren’t going in when it’s crowded. Too much going on, people chasing birds with sticks, and the birds end up hiding high up in their trees. Save the $2 if that’s the case. Pro Tip: Ask for an empty feeding container so you can portion out small servings for kiddos to hold. Nothing worse than a kiddo spilling the entire food supply and leaving early.
6. Snack time: Once you’ve made it around the circle to see Mahali hippo, and find yourself at the elephants, it’s time to take a break. At the elephant pavilion, we like to let the kids sit on the bleachers (hopefully elephants are milling about) while we get a salted pretzel and go in Kamala cafe to get Dole whip. The Dole whips are huge and we always ask for empty bowls to split it up. We all look forward to this little break during our Denver Zoo trips.
7. Pivotal moment: The snack break typically gives us enough boost to get excited about the back half of the zoo, and things tend to move pretty quickly from here depending on general mood. Another pivotal moment will hit you when you get to the sea lions and come face to on face with the reptile house. Take a serious internal look at the time you have left to commit to the zoo, and decide whether you want to go into the house. It requires you to offload all children from whatever stroller or wagon you have before going in (just FYI). Admittedly we normally skip this just because it’s a pain, but we do love the sloths and capybaras that live inside.
8. Home stretch: Only a few exhibits remain between you and the exit at this point and they are not to be missed! During the summer, the newer stingray exhibit will likely be open. Don’t miss it! Even if you don’t want to buy a shrimp to feed them, our girls love to stick their hands in the water and watch them all swim by.
9. Enjoy a nice long nap from your littles on the drive home.
Things to remember:
Bring your water bottles! There are many filtered water refill stations throughout the zoo to help you and your family stay hydrated. And not spend a fortune on bottled water!
Check the weather. While the zoo stays open during even the coldest months, some animals move inside during these times to stay warm.
Pack snack lunch for yourself and your family. Even though there are actual food offerings at the zoo, it should come as no surprise that they are average at best and all overpriced. At a minimum, we have lunch boxes on hand for the girls in case they need something more substantial at snack stop or need to eat in the car on the way home.
Check the Denver Zoo’s Facebook and Instagram page! They keep it regularly updated and we use those updates to share with the girls so they know what’s going on with some of the animals they are seeing or can call them by their names.
Lastly, the Denver Zoo hosts the most amazing seasonal events. Our favorite is always Zoo Lights during the holiday season. You don’t see many of the animals, but the lights, carousel and train at night, as well as all of the festive snacks and treats is one of our favorite traditions. It’s spectacular!
‘Tis the Season
(scroll to the end for recipe)
National BBQ Day was the other day. One of those ambiguous days that you see on insta or FB that reminds you to post a fun picture to “commemorate the day.” That being said, it’s starting to be that time of year when we are regularly up at dawn putting something on our smoker, and yesterday was one of our first days of the season to fire it up. That’s actually not true given we use our smoker all year (including in snow), but there is something very different once summer starts to come around. As such, here is my celebration, a little late, of BBQ. In this case, technically, it’s a celebration of our smoker of choice, the Traeger. If you don’t have one, feel free to connect with me and I’ll be happy to sell you on it.
BBQ is one of those food groups that isn’t plentiful up here in the Mile High, so my husband and I have had to improvise and figure it out ourselves to recreate the delicious smoked meats we love to indulge on. Enter, the Traeger. We received one as a housewarming gift when we bought our house a few years ago, and it is easily one of our most favorite things. It makes cooking so easy, and makes the most amazing, show-stopping meals. We smoke literally everything minus fajitas and steaks. We have tried, and while they are delicious, I just prefer those dishes without the smokiness – personal preference. When exploring recipes, especially with a new cut of meat, I always turn to those specifically from Traeger. There are so many to choose from, just look for the high ratings, flavor profile, and effort level (low please!) you are looking for.
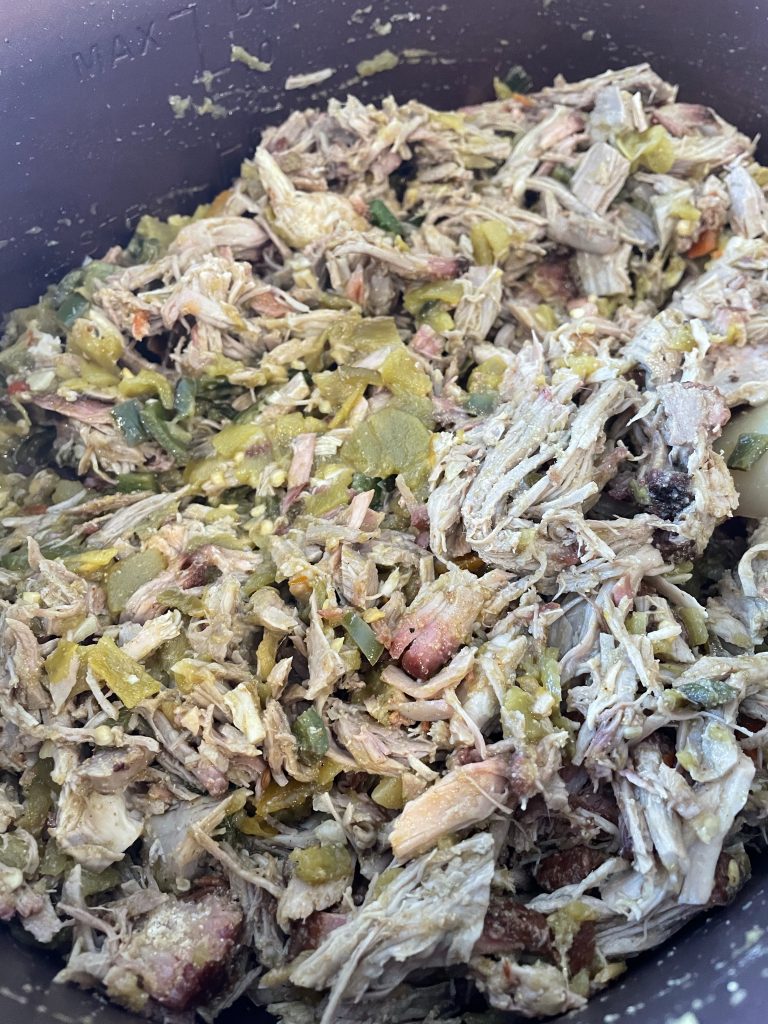
That’s how I found my favorite recipe for Pulled Pork. It’s one of our favorite things to make for several reasons which include: it’s CHEAP, easy, delicious, and the leftovers can be transformed into many different dishes so you aren’t eating the “same thing” for a week. This is key for my family as my husband doesn’t love to eat the same thing multiple meals in a row – aka. Leftovers. You do need to plan for this recipe as total time averages around 10 hours, but I promise it’s worth it.
Life Mantra: Low Effort, High Impact
From a cooking standpoint, smoking meat is easy. While the timing varies, the key is temperature. When you look up recipes, the timelines vary based on weight, altitude, outside temperature, etc, but they are all centered around the temperature of the meat you are cooking. I cannot stress enough – this is key. The new smokers have the gauges set to wifi, so you can check the meat temperature AND adjust the smoking temperature from your phone. This is a FABULOUS feature on the newer editions, and I would definitely pay extra for it. While ours doesn’t have it, it would make things even easier to not have to go outside every so often (sometimes in the rain, snow, etc) to check on meat temp. First world problems, I know. But it ALSO would be nice, if you’re smoking a brisket for example which requires almost 24 hours, to not to have to get out of bed in the middle of the night to check on it. Just saying. I would also consider investing in a thermometer probe that connects to your machine. Most new smokers come with one or two of these, but if they don’t, buy one. For an incremental, minimal cost it will make your life (and your food) much better.
Tips
These are my key TIPS when making pulled pork:
- As long as it is a BBQ style spice mix, the type of rub you use to season the meat doesn’t really matter here. Only that it is applied liberally on all sides. Even if you transform this dish to Green Chili Pork (my personal favorite), BBQ seasoning is perfect.
- This recipe only requires one “extra” step outside of putting the meat in the smoker. When the time comes to wrap the pork, use extra long, durable foil, and make it Reynolds. Brand matters when it comes to foil, trust me on this. You do not want flimsy foil when you need to support almost 10 lbs of meat and liquid. Prepare the foil ahead of time – I recommend using a sheet pan to first lay out 2 LONG layers of foil lengthwise, then 2 additional layers of foil horizontal. It should look like a plus sign. Gently press into the sheet pan so there is a well where the pork and juice can sit without leaking.
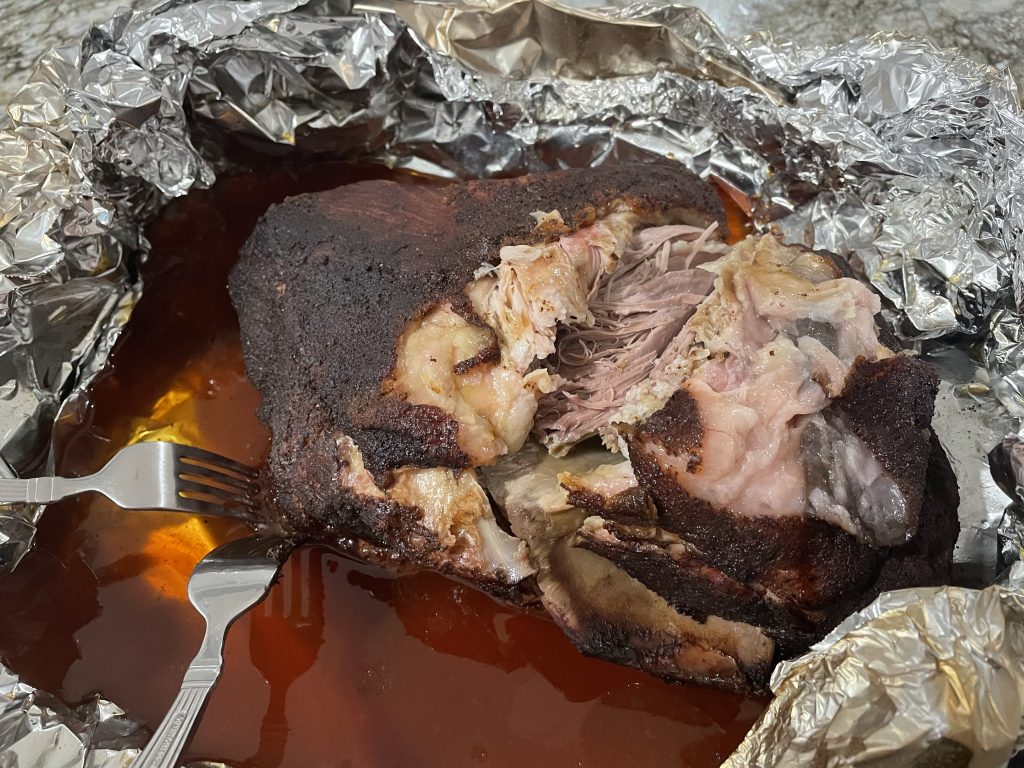
- Let’s talk about the STALL. What I have discovered is that certain cuts of meat (particularly at high altitude) experience what is called a cooking stall. Pork shoulder has reliably been one of those meats for us. What it means is that it stalls at a certain temperature for a LONG time. Typically right as you are waiting for a next step or to pull the meat off. For us, we have noticed that this cut typically stalls around 196 degrees which is just short of the recommended finished cooking temperature. While there are many ways to push through the stall (thank you Aaron Franklin for your Brisket Masterclass), the easiest for me is to crank up the heat a little to try and push through. For us, we go up to 350 and watch closely to ensure the pork doesn’t overcook. We have also lost patience (many times) in this process and pulled the meat at 200 (instead of 204) and it is still perfect once it finishes it’s rest period.
- When it comes time to shred your pork, I recommend preparing a station. This makes cleanup and your shred quality much better. When you pull the pork, I recommend letting it rest in the same sheet pan you prepared the foil in. This ensures no juice will leak onto your counter surface. After resting for an hour, gather a large cutting board, and a large bowl or serving platter, and 2 forks. When you open the packet, I start by lightly scraping off any excess fat with the flat side of a fork. This slides right off. Then I remove the bone and let it lay in the packet. Working in small chunks, I just fork off sections of the pork onto my cutting board and shred small pieces at a time. I don’t love extra fat (personal preference), so as I shred, I put excess fat pieces back into the foil packet and only perfect components into my serving dish. This ensures manageable shred quantities, perfect bites, and keeps scraps and trash contained within the foil packet. For a cooked 9 lb pork shoulder, this process typically takes me 30 min.
- For serving, if we have made this for a party, I love to serve it up family style on a big platter for people to help themselves! Serve it with an assortment of BBQ sauces, pickles, variety of sliced cheeses, buns, etc. to make it fun, delicious and EASY. While Headcountry’s Original BBQ Sauce will always be our traditional favorite, last year, we grabbed a bottle of Lillie’s Gold barbeque sauce on a whim and now it’s a must serve whenever we make this. I love the vinegary tang of it.
Now for the Recipe!
Easy Peasy Smoked Pulled Pork
Ingredients:
- 1 (6-9 lb) bone-in pork shoulder
- 2 cups apple cider
- Preferred BBQ Spice Rub
Instructions:
- Set smoker temp to 250 and preheat, lid closed, for 15 min.
- While smoker preheats, trim excess fat from pork butt and season LIBERALLY on all sides. Let sit for 20 min. This is when I recommend placing the temperature probe in as well. Make sure it is not touching the bone and is going through the center of the meat (not down from the top)
- Place the pork butt fat side up directly on the grill and cook for 3 to 5 hours or until the internal temperature reaches 160.
- While the pork cooks, prepare the foil packet. See the key info above, but stack 4 strips of foil onto a baking sheet ensuring they are long enough to wrap around the pork butt. Press along the sides inside the baking sheet to create a large well.
- Unplug the temperature probe (if using) from the trager, and move the pork butt onto the foil in the center of the well. Gently pour the apple cider over the top of the pork butt, then gently wrap the foil around the pork (bring each side together and roll down the edges) being careful not to let the apple cider leak out and be mindful of the probe.
- Place the foil wrapped pork back on the grill (still fat side up) and cook 3 to 4 hours longer or until the internal temperature reaches 204.
- Remove from the smoker and allow it to rest in the foil packet for 45 min to an hour.
- Shred and Enjoy! See Tips above for my shredding method. The original recipe calls to add back the strained cooking liquid to the meat. I have never done this, but I’m sure it’s delicious.
For those of you Texans who have had the pleasure of dining at Roaring Fork. There is no doubt that you have had a steaming individual cauldron of green chili pork stew with melty cheese and buttered tortillas. I didn’t know buttered tortillas were a thing, but I promise you, they are essential.
Creature of Habit
This dish is now the only thing I can order whenever I go to Austin. Typically with a side of green chili mac since I can’t help myself. While there are many other incredible things on the menu, there is something truly special about the green chili pork stew. As fate would have it, I ended up moving to the home of the namesake of this amazing restaurant – the Roaring Fork River and have been trying to emulate this recipe ever since. To be honest, I tried a few times in Houston just because I missed it.
The Secret is Out
Another recipe I’ll be sharing soon is our pulled pork. After moving into our house, we received a Traeger smoker as a housewarming gift and it has become one of our most beloved items. I truly believe if the house caught fire the traeger would be the first thing my husband tried to save after our girls and pup. I think this is the start of the secret to our perfect green chili pork stew. Admittedly, I fell into this recipe by trying to figure out what to do with several pounds of leftover pulled pork that I didn’t want to put on another BBQ sandwich. Enter, stew as one of my favorite ways to use pulled pork. I would even (and have) made pulled pork just as an excuse to make this stew.
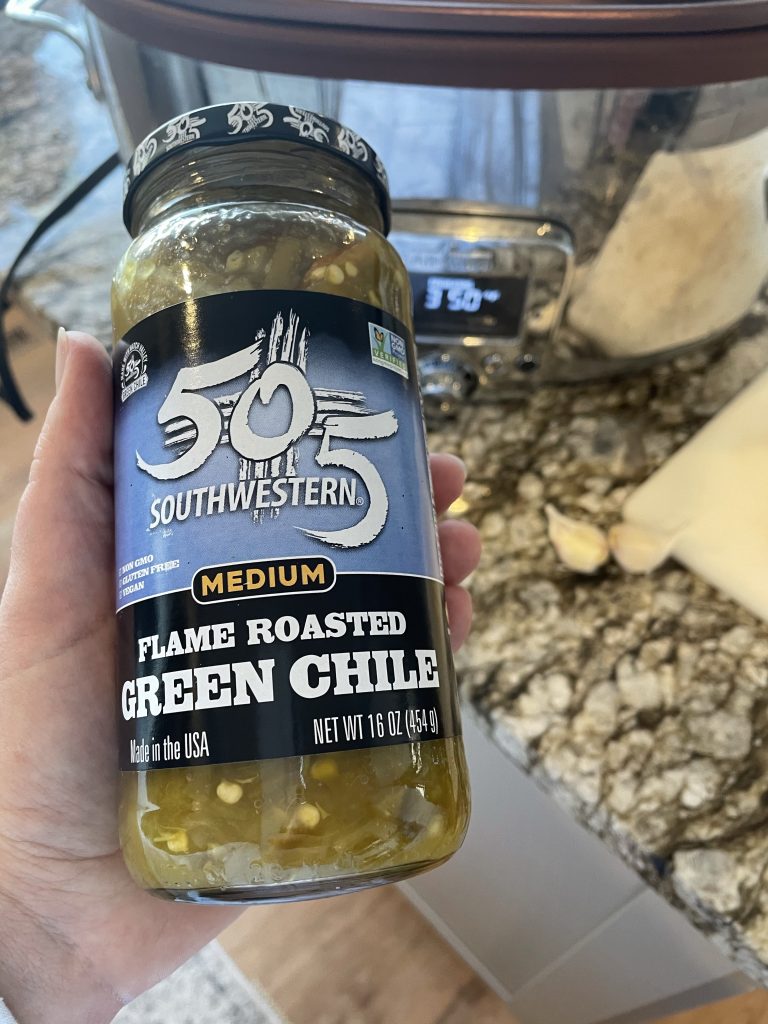
My other secret, a jar of 505 green chilis. While I love good food and to cook (sometimes), I hate prep and I am scrapped for time. This includes the lack of time to fire roast and peel my own green chilis. I’ll also note that in several recipes I’ve found online claiming to have the secret to Roaring Fork’s stew that they use green chili POWDER. This seems blasphemous to me, which led me to the search for the best alternative. I promise you this brand does not disappoint. The flavor is perfect, the consistency is exactly as if you roasted and chopped your own, and best of all…. No powder. Not sponsored, just a perfect product.
Outside of that, everything else is as simple and tossing it in the slow cooker and letting it work it’s magic. Small clarification, your slow cooker matters. I’m obsessed with our All-Clad slow cooker which browns AND slow cooks in the same pot. Not only does this make my life easier, but it also reduces the amount of dishes you have to do! If you know me, you know one thing, I hate cleaning. I wish I was one of those people who were OCD about cleaning, but I’m not.
I’ll also note that any recipe that calls for jalapenos, I take the seeds out. We are spice sissys in this family, and can’t handle the seeds. Obviously, if you are not on that spectrum, go wild.
Texas Tundra
I can’t help but think of my family and friends right now in Texas as they navigate a truly historical cold front and the hardships that are coming with it. As I look out of my sunny window at no snow, I think on the pictures from friends and family in Austin where their neighbors are literally SKIING down the street, and battling no power, water and many with busted pipes. It feels backwards to say the least. Texas is not built for tundra. It can handle many things, but an arctic blast is out of the realm. When my husband and I look at the forecast and see chilly weather ahead, this is what we plan for to see us through some indoor, blanket days.
(The Best Ever) Roaring Fork’s Green Chili Pork Stew Recipe
- 2 lbs pulled pork, shredded or diced (see Note 1)
- 1 yellow onion, diced
- 1 jalapeno pepper, seeded and diced (2 if you are feeling wild)
- 1 poblano pepper, diced
- 2 – 4 cloves garlic, minced
- 16 oz Fire Roasted Green Chiles (Favorite: 505 Southwestern)
- 2 TB ground cumin
- 2 TB ground coriander
- 2 TB onion powder
- 1 TB garlic powder
- 1/4 cup flour
- 2 – 4 cups chicken stock or enough to cover the pork and veggie mixture
- 2 TB olive oil
- salt and pepper to taste
- Shredded monterey jack cheese
- flour tortillas
Instructions:
Note 1: If you don’t have pulled pork on hand, dice up 2 pounds of pork shoulder. Season liberally with half of the spice mixture, and set your slow cooker to “BROWN” or turn a skillet onto med high heat. Brown all sides of the pork roughly 2-3 min per side. Once brown, remove to rest on a plate and wait for Step 2.
- With your slow cooker set to brown, toss in the onion, jalapeno, and poblano to saute until softened in 2 TB of olive oil. If you don’t have a slow cooker with this setting, just use a skillet for the same effect then transfer into slow cooker.
- Once softened, turn slow cooker to “SLOW low” and toss in garlic for 1 min, then the jar of green chiles and the pork.
- After a quick toss, add in the spices and the flour and stir to evenly coat.
- Once coated, pour in the chicken stock to cover the mixture completely. You can adjust depending on how stewy vs. soupy you prefer your outcome to be. I like it to be on the stewy side.
- Let cook on the low temperature setting for 4-8 hours. Everything is already cooked, you’re just looking for a perfect blend of flavors and thickening of the sauce. I’ve pulled this both after 4 and 8 hrs with excellent results. Just watch the liquid level if going to 8.
- Serve with buttered tortillas or over rice/quinoa with plenty of monterrey jack cheese.
The Great Cookie Debate
(Scroll to end for recipe)
If you’re like me, the hunt for the perfect chocolate chip cookie recipe never ends. I have yet to find “it.” That being said, I hit moments where I get close. When I’m trying out recipes, I’m always comparing them to my memory of the perfect chocolate chip cookie. For me, it’s hands down the chocolate chip cookie from Tiny Boxwoods (the West Alabama one thank you). It’s everything from how they present it to you on it’s own personal wooden cutting board, to how it always comes out just warm enough to where it’s set but still melty and perfectly salted. Perfection. I’ll take 2 with a glass of their iced sangria please.
I have searched high and low for an imitation recipe of this cookie, and tried many of the recipes who claim to have duped the original, but with no luck. The outcome is never the same. Tiny’s chocolate chip cookie is in a league of its own. Tiny’s, if you read this, please expand to Denver – there are so many of us transplanted Texans that I promise we would support the business. If you need a location scout to emulate that West Alabama or even the West U experience (with better parking), I have thoughts.
When we moved to Denver, I started the search again for the “perfect” chocolate chip cookie since my previous failed attempts at recreation were now paired with the inability to cheat and just go buy them. After too many recipes and trials to count, I finally landed on what would become my HUSBAND’s favorite chocolate chip cookie. I love this cookie recipe too, but the texture is a little crisp for me. I prefer a chewy cookie, even when it’s room temp and a day old. Will post my husband’s favorite at a different time – it does have a genius method to it and comes out perfect every time. Just not MY favorite.
A move sparks a new favorite
After we had our first baby, we relocated from Denver (Cherry Creek) to South Denver. While this put us out of Denver’s food scene, we were introduced to what I can call the equivalent of Eatzi’s in Denver. Enter, Tony’s. Tony’s became our go-to place almost immediately for quality cuts of meat, amazing desserts, and specialty food items. One of the things I love about Tony’s is that they continue the tradition of giving children free cookies while shopping with their parents. Admittedly, I stole a bite of my daughter’s free cookie one day and immediately discovered our high-altitude perfect chocolate chip cookie.
Very different from Tiny’s chocolate chip cookie in both flavor and texture, Tony’s chocolate chip cookie is lighter in color, very sweet, and hits more on the cookie dough spectrum of the flavor profile, IMHO. Quick shout out for all of Tony’s other cookie offerings as well… My personal favorite is their chocolate chip cookie with the addition of butterscotch chips. What also makes Tony’s a game-changer for us in the cookie department is that they sell their cookie dough FROZEN in pre-shaped balls, so you can bake all of them at one or pull one out to pop in the oven if you get a craving. We can no longer keep these in our freezer for obvious clothes-fitting reasons. Financially as well, we needed a cheaper option to make our own Tony’s cookies instead of splurging for the $15 2lb bin of frozen dough. Worth it, but EXPENSIVE! The amount of money we were spending monthly on cookie dough was embarrassing.
Back on the hunt
After a few years of having our go-to chocolate chip cookie recipe – aka Husband’s favorite – I was back on the hunt to find a recipe that would give me that salty, doughy texture to emulate our new favorite cookie at Tony’s. After what would become close to a year of cookie trials, my husband finally requested we go back to our “normal” chocolate cookie recipe. Right as I was about to give in to the request is about the time I discovered Half Baked Harvest.
As someone who feels like the Rockies market is un-tapped as far as cooking goes, I was thrilled to find a high altitude food blogger. No more endless, failed efforts at high altitude baking conversions! Her food is also super creative and different from our normal menu. Just from a personal perspective as well, I enjoy her approach as very refreshing change to the normal “me monsters” that seem to flood my instagram.
After trying (and loving) several of her savory recipes – I’ll do a post on some of my favorites another time – I did a search through her site to see if she had any chocolate chip cookie recipes. The one I settled on was her HBH Christmas Chocolate Chip Cookie Recipe which is actually a recipe from Sally’s Baking Addiction who can do no wrong in the kitchen! There are 3 key things that stick out about this recipe, one of which made me a convert right away. The first is a lower baking temperature than your standard 350, the second is the addition of a single egg yolk, and the third is the call for MELTED BUTTER.
The Butter Revolution
I can honestly say in my YEARS of searching for the perfect chocolate chip cookie recipe, I have never come across one that uses melted butter. That was enough to get me to try it. Particularly since I loathe creaming butter and sugar. Yes, I have a KitchenAid mixer, but still. For some reason, this is not a favorite step in any baking, I never have the foresight or patience to allow the butter to properly come to room temperature, and I was thrilled to not have to deal with the cleaning of my mixer that particular evening.
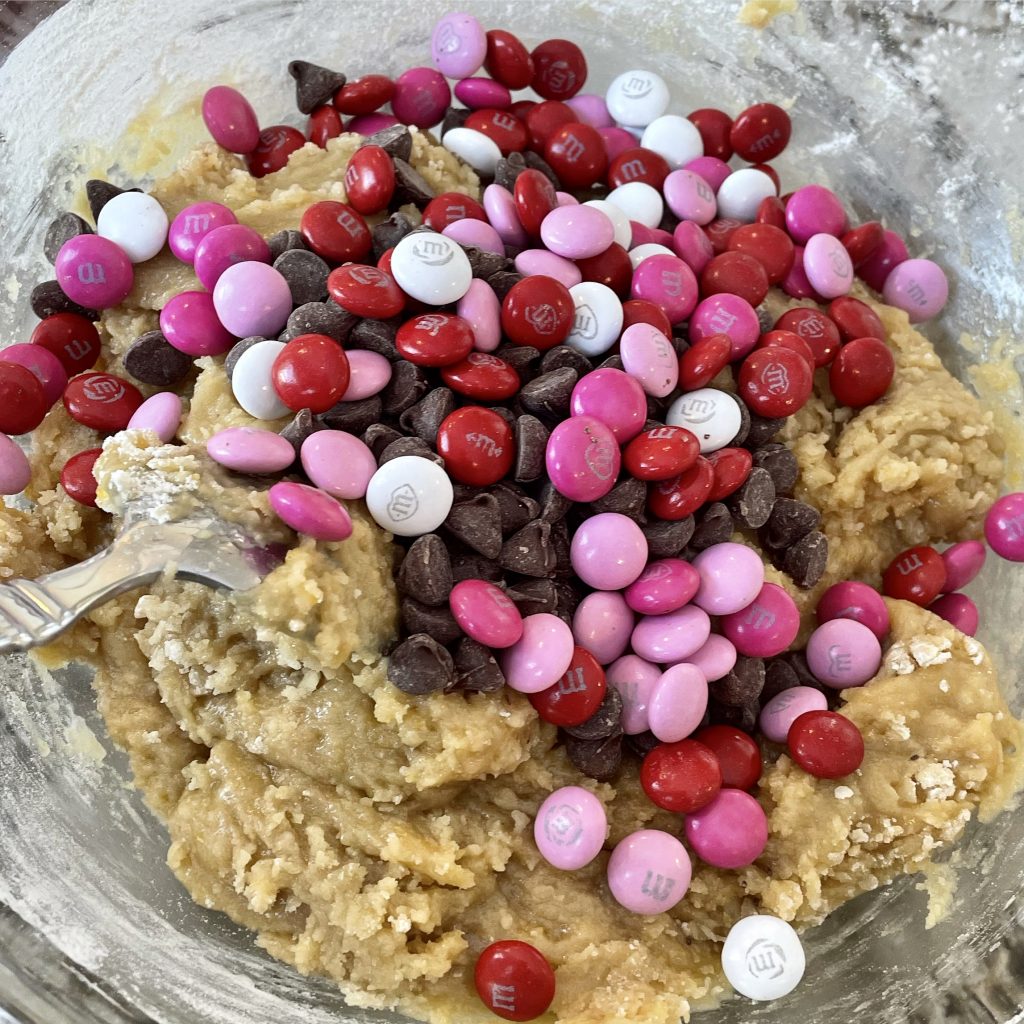
Randomly, I was also on an M&M kick due to my toddler’s recent discovery of M&Ms, so we are putting them in literally everything to make it fun! That however is one of the changes I have made from the standard recipe. I don’t always feel like candy in my cookies, and when looking for pure chocolate chip goodness, I don’t add them and just double the chocolate. When I’m looking for fun or my toddler wants to assist – the M&Ms come back! I recently just made them with Valentine’s themed M&Ms and they are darling (and delicious).
Full disclosure – my husband thinks these chocolate chip cookies are “too dense.” Sorry, the debate continues. But he is wrong as you can’t achieve a doughy chocolate chip cookie WITH crunchiness. The 2 opposites marry each other.
My (barely there) changes
Y’all, I am not a recipe developer and am average in every way around the kitchen. That being said, thanks to Samin Nosrat, I have become addicted to SALT to balance out my sweet dishes. Also paired with my love for vanilla (thank you Ina), these are the 2 changes I made to adapt this already perfect recipe to my particular tastes. More salt and more vanilla.
I also want to specifically highlight a few of the instructions HBH provides to ensure a cookie set apart from the others:
- Bake at 325 degrees – YES. Reminder to not go on autopilot here with 350!
- The cookies will look very soft and under baked – YES. You don’t want a hint of any browning. I didn’t follow this advice the first time I made these and was vastly disappointed by the turnout. No dense doughy-ness. Only crispiness once cooled.
- Remove from oven and allow to cool on cookie sheet for 10 min BEFORE removing to wire rack – YES. This is totally counterintuitive to what I normally do with cookies as I’m inclined to put them on the cool rack right away. Gamechanger.
One of the best things about these cookies other than their adorable appearance, delicious doughy texture, and flavor is their ability to stay fresh for a few days after baking. HBH states 10 days, but cookies have NEVER made it longer than 3 days in my house. That being said, on the 3rd day, they still tasted just as good and perfect as the day I made them.
Time for the recipe! Give them a try – I promise you will love them! Unless you are like my husband… If that’s the case, package them up and give them to your neighbors for some goodwill.
The Non-Debatable Best Chocolate Chip Cookies
Ingredients
- 2 ¼ cups all-purpose flour
- 1 teaspoon baking soda
- 1 ½ teaspoons cornstarch
- ½ teaspoon salt – I add an extra ¼ tsp to make it ¾ tsp total
- ¾ cup butter, melted
- ¾ cup light brown sugar, packed
- ½ cup granulated sugar
- 1 large egg plus 1 egg yolk
- 2 teaspoons vanilla extract – I overflow to a scant tablespoon
- ½ cup semi-sweet chocolate chips
- ½ cup M&Ms (or choc chips if not feeling candy)
Instructions
- Whisk the flour, baking soda, cornstarch, and salt together in a large bowl, Set aside.
- In a medium bowl, whisk the melted butter, brown sugar, and granulated sugar together until no sugar lumps remain. I like to do this on the stovetop, but let cool slightly before you add the eggs.*
- Whisk in the egg, then the egg yolk, then the vanilla.
- Pour the wet ingredients into the dry ingredients and mix together with a wooden spoon or rubber spatula.
- Fold in the chocolate chips and M&Ms
- Cover the dough and chill for at least 2 hours (or up to 3 days)
- Take the dough out of the refrigerator and allow to soften slightly at room temp for 10 minutes while the oven preheats.
- Preheat the oven to 325 degrees F. Line your baking sheets with parchment paper.
- Roll the dough into balls, about 3 TB per cookie. I like to use an ice cream scoop and then split the scoop in half – 2 cookies per scoop.
- Place onto cookie sheet, do not flatten, about 3 inches apart
- Bake for 11-12 minutes. They will look soft and under baked.
- Remove from the oven and allow to cool ON the cookie sheet for 10 minutes before moving to a wire rack to cool completely.
- Optional: Sprinkle with flaky sea salt
- Cookies will stay fresh in an airtight container for up to 10 days – no way they last that long 🙂 I prefer to bake off a few and then while the cookies are baking, roll, freeze and bag the remaining dough so I can bake a few whenever I need them.
*I’ve also made these several times in one bowl when I’m feeling particularly against doing a million dishes.
The definition of Magic

We saved the best for last. We arrived at the gates of Magic Kingdom 30 minutes before opening, and we were able to walk right in! Y’all, if you haven’t been to Magic Kingdom while it is decorated for Christmas, add this to your travel bucket-list. Even though our toddler’s face was covered by a mask, you could still see the complete wonder in her eyes and hear her awed “Wowwwws” and “Mommy Look.” It was beyond the magic I was hoping for.
While the other parks still seemed busy even with the 30% attendance cap, Magic Kingdom felt empty. To be honest, I loved this. Pandemic aside, I don’t like massive crowds. They stress me out, and I was already thinking about the joy of being able to walk at our own pace without dodging other family groups and not having to wait in line for 4 hours.
Our group leisured down Main Street taking in the sights and reveling in all of the Disney magic. Still before “opening,” we took pictures in front of the castle and made our way to Seven Dwarfs Mine Train to get in line. There were some rides that had opened early, so while everyone waited in our first line of the day, my SIL and I took the babies to wait elsewhere. Unfortunately, she had to evacuate to Main Street to recover from a blowout (#iykyk), so it was just me and my girls.
Prince Charming’s Carousel
On our way to the Mine Train ride, we passed the carousel. Not just any carousel, but Prince Charming’s Carousel. To my horse-obsessed toddler, this was the ultimate and we could not wait. I put baby in the Ergo and got in line for the carousel. This is joke – we were the first ones on!
I was a little nervous as I had to sit in one of the stationary carriages since I was wearing the baby. You are welcome to stand next to your child as long as you don’t have another one strapped to you. Makes sense. Thankfully, all of the horses were equipped with safety belts which made me feel a little better about letting her ride by herself. She walked almost one complete loop in complete wonderment of all of the beautifully painted animals before selecting a gorgeous prancing white horse. Once the carousel started, I could tell she was nervous to be up there by herself with the horse moving, and she was holding on TIGHT. By the first rotation around, she relaxed and I could see the smile through her mask. It’s one of my favorite memories looking up at her on her horse being so brave and having so much fun!
This was one of the highlights of our trip, and she was so excited to tell Daddy when he finished the Mine Train ride. By the time I ran through the rider switch for the Mine Train, the line at the Carousel had hit more than a 30 minute wait. If you are looking for a perfect start to your day at Magic Kingdom, my pick is unconventional, but ride the carousel.

Lines, Rides, Walk, Repeat
We spent the rest of the morning knocking off rides, analyzing wait times on the Disney Experience App, and just taking everything in. Splash Mountain and Thunder Mountain Railroad took more than 2 hours collectively, but they are 2 of my absolute favorites, and I can’t go to Magic Kingdom without riding Splash Mountain. It was tough with the babies who were waiting with the husbands, but thankfully, the wait area was right next to the parade route! While I waited in line with my SIL, the babies were able to see the Princess Parade and a Santa Parade. Thank you Disney for this current sporadic parade plan. It’s a life saver for those with squirmy babies and toddlers.
It was also so fun to come off of my favorite ride and see my toddler come running at me to tell me about all of the princesses she saw – and Santa of course!
After lunch in Frontier Land, we did one last ride before going to take a mid-day break at the hotel. As it turns out, this was THE ride. My toddler is STILL talking about this ride 2 months after our Disney vacation. That is how impactful it was. The ride – The Little Mermaid. Do not underestimate this floating pink clam ride. It is precious and glides you through The Little Mermaid in such wonderful color and imagination like one long, immersive music video. You even go “under water.” It is the absolute cutest and we rode it 3 more times over the course of the day.
No Nap, No Problem
I talk more about our hotel in another post, but I am a big proponent for the mid-day break if you have little ones. We didn’t do this with the other parks, but that is primarily because they were smaller (Animal Kingdom) or they were only open half-days (Epcot). This was crucial for our last successful day at Disney, or we would have 100% encountered a meltdown from all kiddos (and also likely the adults…). Our kiddos didn’t nap, but being able to lay down on the hotel couch, snack, watch cartoons and decompress was a close equivalent.
After a 2 hour reset, we were back at Magic Kingdom by 4pm and determined to explore the other side of the park – Tomorrowland, etc. One of the downsides of being with a large group is deferring your personal plan in favor of the group plan. This was actually a great exercise for my normal Type A / Itinerary-driven self. As everyone knows, time flys at Disney, and our evening was no exception. We found ourselves finally arriving at Dumbo (one of the rides we absolutely had to do) around 6pm which turned out to be perfect. With the sun setting, Dumbo was completely lit up and pure magic. Our toddler was beside herself with excitement and there was NO LINE. Apparently during “normal world times,” there is a playground within the queue where they give you a beeper so your kids can go play instead of waiting in line. This is genius – though I was thrilled to have no line!
We talked about Dumbo all the way to our last ride, It’s a Small World, but of course had to stop for one more round of Ariel. I can’t say we saved the best for last, but maybe the most iconic for last? We barely made it onto the ride with the 45 min wait as the park neared close, and the husbands still haven’t forgiven us for forcing them on this ride. I will say that the kiddos loved this ride. There’s the song, of course, but there is also so much detail in all of the stories and dancing dolls. Both of my girl’s eyes were wide the whole time trying to take everything in.
Wrapping up the best day
We were hustling to get out of the park to make our 8:45pm dinner reservation at Wolfgang’s in Disney Springs. Our only stop was to quickly admire the lit up castle, and then again at the gates where Mickey, Minnie, and friends were standing, singing and waving at everyone leaving the park. Due to the lack of crowds, our toddler was able to be right at the front and get personal waves and hellos from her favorites. Truly magical. She was SO tired, and seconds from passing out in the gift-shop umbrella stroller, but perked right up and couldn’t believe her favorites were right there singing carols to her! I couldn’t have planned or imagined a better end to our day at Magic Kingdom.
To make our dinner reservation, we did some logistical planning on the fly, and decided it would be fastest to catch a bus to one of the hotels that was walkable to Disney Springs instead of taking the bus to our hotel then jumping on the connection. Toss up on if this was a good idea, but we were all hungry and tired with little brain power left.
After sprinting (literally) to Wolfgang Puck Bar&Grill, we made our reservation by about 2 minutes. As a mother of a toddler and a baby walking into a nice restaurant as the last reservation, I was actually dreading the experience. As someone who cares very much about being a bother to restaurants (why do I feel this way?), I was convinced that our giant party of 11 with too many kids would definitely rub this restaurant the wrong way. I could not have been more wrong.
In another post, I talked about one of my other favorite restaurants at Disney Springs, but this is definitely a tie for the No.1 spot due to the food and the service. Despite our army of children, our server could not have been more friendly, helpful, or refreshing. They cleared spots around the table so that we could pull 2 of the strollers up since 3 of the kiddos were passed out, and treated us as if we were the first and only guests of the evening. I could not have been more grateful. The kiddos were also well behaved throughout the late evening – for this I was also grateful.
Aside from the incredible service, even once all children woke up HUNGRY, the food was delicious. Truly delicious. Everything we had was perfectly cooked, and so tasty. Our group lingered, enjoying our last evening together, and we were not rushed. It was a perfect way to end our magical trip, and I will definitely be back. We walked out of Wolfgang’s around 11pm, full, tired, and happy.
I mentioned it before, but my toddler still talks about this trip – 2 months later. I know there is an argument for “Well, they’re too young to remember,” but I will.


Small but mighty
On our second full day at the park we were TIRED. We ran on adrenaline during our first day at Epcot, and all of it plus the previous travel day definitely caught up to us. That being said, we could not wait to get to Animal Kingdom! It was our first early morning at the park, and even though the time change was a 2 hour difference, our girls were rockstars. I was so excited for them to see the Christmas Tree at the entrance of Animal Kingdom. It was always one of my favorite things to see when I was a kid.
We strategically picked Animal Kingdom for our second full day since it is a smaller park than Magic Kingdom, so we were hoping to be able to call it an early-ish night and get some rest before our big last day. We also did significant research into what rides we should head to first (see Under Cover Tourist’s One Day Park Plan) to avoid the longest lines and maximize our time with minimal meltdowns. One of the benefits of pandemic-Disney is that attendance is capped at 30%, so you are automatically competing against less people. However, that also means no fast passes. Thanks to a few really helpful sites and monitoring the Disney Experience App for a few days prior, we knew that absolutely everyone would be headed to Pandora as soon as the gates to Animal Kingdom opened.
We also knew that even though we arrived early (we got there 15 minutes before the gates opened), there was no way we could get to Pandora with the necessary speed toting 6 kids with 2 strollers. So we went straight to Africa! This was the absolute best decision we made all day as Kilimanjaro Safari is one of my very favorite rides in all of the parks and had ZERO wait. Animals are also most active early in the morning – and they certainly put on a show for us! Our toddler STILL talks about the big hippos she saw that morning.
Boat parades are better
After Safari, we headed to ride Everest! We figured all the big crowds were still at Pandora, so let’s hit the next most popular ride. This is also the first ride where we tried out the Rider Switch program which was literally life changing for us. If you aren’t familiar with it, essentially, it allows whoever is watching the too-small-to-ride kids a chance to go to the front of the line instead of waiting in the entire line again. GENIUS. After we scanned our bands, my husband and I took ALL of the babies to the arena area on the water right across from Everest. This is the perfect waiting spot since you can sit MASK FREE as there is no one within 500 yards of you. While we waited for our group (about 30 minutes), we saw 3 boat parades go by! They came right up to where we were sitting, music blasting, and all of the characters dancing in their safari-wear. It was wonderful. No crowds, no crowding, just a casual VIP character experience.
These were so fun to see throughout the day as well! Our family really ended up preferring the new, sporadic and frequent parade initiative Disney adopted in all of their parks. Not only did this reduce crowding, it ensured we didn’t have to keep multiple babies and toddlers stationary and entertained “holding our spot” for an hour before the parade actually came by.
Our first Disney meltdown
After hitting Dinoland, another toddler favorite, we headed to Bugs Life which coincidentally was TRAUMATIC for our toddler. We thought the show would be a major hit, and I almost laughed when during the intro we were informed of the emergency exits for those kiddos who thought the show “too much.” Well, this was us within the first 30 seconds. I guess there isn’t anything more frightening to a toddler than a million bugs and bees flying in front of your face in 3D paired with bugs “running” under your seat. We had to evacuate. On a positive, our first (and only) Disney toddler meltdown was short lived as soon as we escaped the Tree of Life. If you were curious, the babies loved it. No fear.
Finally ready for Pandora, we stopped for lunch to fuel up before braving the lines and ended up at the highly-recommended Satu’li Canteen. It did not disappoint. Cheese quesadilla for the kiddos, and I had the Cheeseburger Steamed Bao Buns which were both equally as delicious as easy to eat with one hand. This last feature is KEY when you are trying to eat and wrangle squirmy babies. I would also like to mention what makes Disney different – the people. As soon as I went to the counter to pick up our waiting order, I was immediately asked by 2 employees if I needed assistance carrying the trays and drinks to our table. I had a baby strapped to me, but still. Above and beyond in every aspect.
After lunch, we braved the full 45 min wait for the Na’vi River Journey. Thankfully (or not) there was an ice cream cart by the line which was a big win for all the kiddos as they braved post-lunch fatigue in a LONG line. The ride did not disappoint – even our 9 month old loved it given all of the lights and sights. It was amazing.
We saved the best ride (and longest line) for last. Flight of Passage is everything you read about – the hype is real. We did the Rider Switch again for this ride since most of the kiddos were too small to ride. After waiting for group one to go through the line and ride, my husband and I almost passed on it since our kids were tapped out. I’m so glad we didn’t. This was literally the best ride I’ve ever been on. It was wonderful. Literally no other way to put it. Do it! And maybe take a Dramamine beforehand. Thankfully I took one while waiting an hour for our group just to be safe…
Where to eat at Disney Springs
We called it a day after this and went back to the hotel around 3 to regroup and get ready for dinner. I should note both baby and toddler passed out between Pandora and the gate entrance. Thankfully, they were able to get in a nice nap ahead of our first night at Disney Springs. I didn’t know what to expect, and it certainly didn’t disappoint! Similar to the parks, you were temperature screened upon entry (all entries into the Springs were controlled by police). We ate at The Edison, and I can honestly say I would have eaten here every night. The menu was perfect for our large group of 11 including our group of picky kiddos. It was also very trendy without being annoying. The ambiance was perfect. There was live music, every dish was delicious, and the drinks were divine. Eat here. I would recommend every night. It was a nice break from overpriced, edible-at-best park and hotel food.
While Disney Springs has a lot of basic generic shops you would find in any mall, there’s something about it. Disney has sprinkled the magic here as well. I loved walking through here at night with it all lit up for Christmas and music is coming through the speakers. It’s magical. The numerous dessert stands and shops don’t hurt either – hello churros!

How are we not prepared?
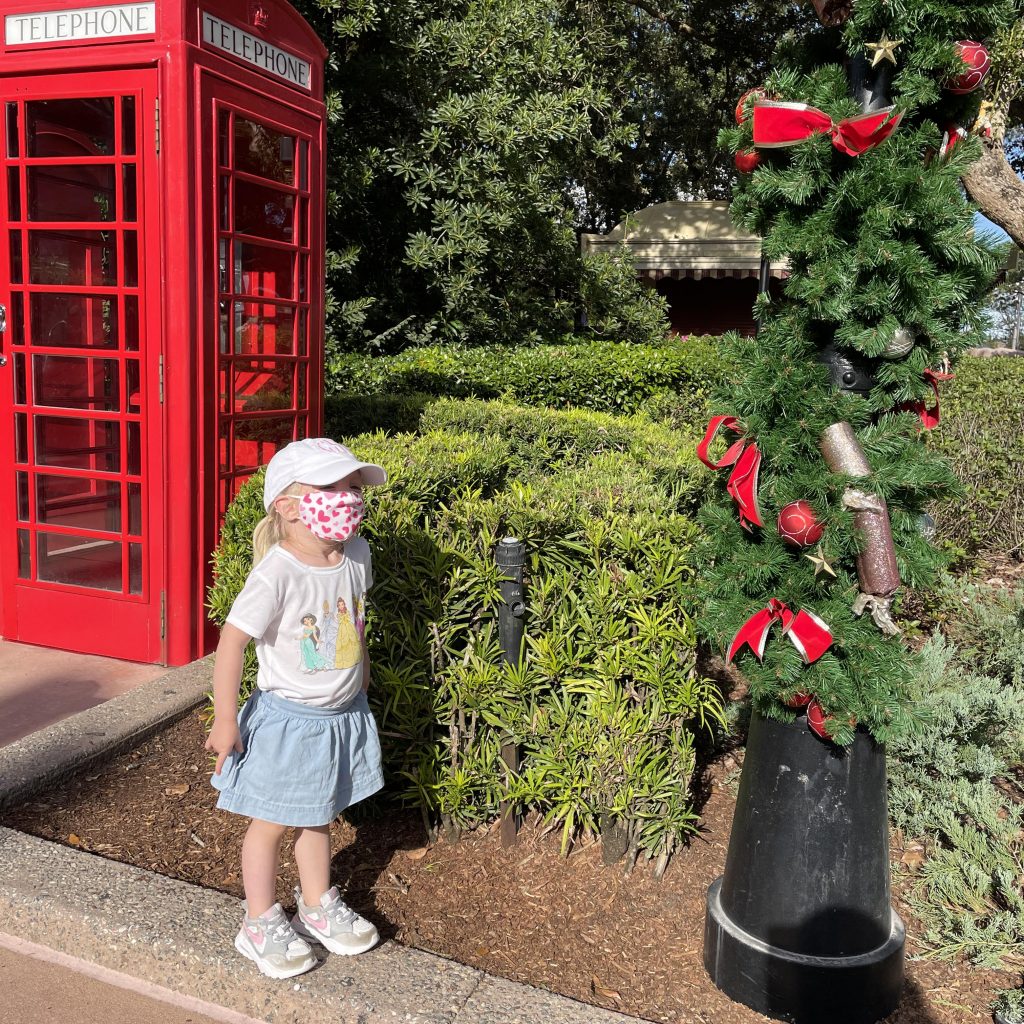
Epcot was our first day at Disney, and we were NOT prepared. First off, as much as I love our Uppababy Vista, it is NOT the stroller you should bring to Disney (See Volume 1). Unfortunately, we realized this Day 1 trying to get on the bus from the hotel to the park. Although it folds well, it does not fold tightly, nor is it “carry friendly” once it is folded. Especially when you are having to carry the diaper bag, Disney day bag, and wrangle 2 squirming babies all while other families are waiting on you battling the same battle. I was incredibly envious of my SILs Uppababy double-umbrella stroller that was instant fold and so light to carry PLUS the sealing deep pockets that eliminated the need for the Disney Day bag. Next time… Anyways, although there are a lot of big and fun rides at Epcot, our whole purpose for visiting Epcot was singular. We were at Epcot to see Elsa and ride Frozen in Norway.
The hours at the parks are different than normal right now thanks to COVID, but we were there 15 minutes after the park opened at 11am. We had the baby in the stroller, and our toddler was pumped. She had no idea where we were (yet), but she was excited to be there and was loving that every employee she saw said, “Hello Princess.” Already the Best Day Ever, and we hadn’t even made it through the entrance! It took my husband and I a bit to get our bearings once we got into the park given the construction. Thanks to the Disney app, seriously, we were able to map out walking directions to the Frozen ride, our first and most important destination.
Elsa and Santa!
Right when we got to the line, which happened to be where parades started, we were stopped by Elsa and Anna leading a parade! It was literally the most magical opening we could have ever imagined. Toddler was beyond excited and could not believe she was almost arm-length from her most favorite queen and princess. They saw her and smiled and waved right at her – I would have paid to stay at the park 5 extra days at that point to recreate that moment over and over again.
Even though we were at the line 20 minutes after park opening, it was a 1.5 hour wait to ride Frozen. Thankfully, being next to the parade entrance and exit, we were able to watch 3 parades go by which was so fun. After seeing Elsa and Anna, there was a parade coming back towards us and it was Santa! He was in a giant sleigh getting pulled by 2 gorgeous draft horses. For our horse-crazy toddler, the joy was overwhelming. She was speechless. I don’t know if the horses are a result of the current COVID environment so characters are not interacting with visitors, but every parade seemed to have at least 2 horses included. Double win!
Worth the wait plus many snacks
The Frozen ride was definitely worth the wait, and we were so glad it was the first ride both of my girls experienced (ever). Although you can carry babies on the ride to hold the, I’m so glad I kept ours in her ErgoBaby! While it’s not an intense ride by any imagination, there are a few quick drops and I was glad for the containment.
Our toddler is still talking about this ride, and the Scary Snowman in particular! Disney does things so well, and this ride is no exception. We would have gladly waited in the line again if we had the snacks to support the wait!
No Reservations – Epcot Edition
We knew that deciding to make a last minute trip to Disney would have it’s challenges. Primarily, the lack of restaurant reservations. While this may seem lackluster, and it is, it did pose some issues for us throughout our trip. That being said, it was nice to have the freedom not to be tied to a certain time. The app made things easier as far as waitlist walk-in times, and we were able to secure a 1.5 hr waitlist for a walk in at the Rose&Crown Dining Room.
We took our time walking from Norway to England, and we still had to pause and carry our toddler part of the way. After a long day of travel the day before, we were tired and ready to sit and take a break. While waiting for our table, we paused at a garden bench to eat more snacks and rest. A lot of people watching went on while we waited, and I will say there were a lot of people eating snacks along the sidewalk which didn’t look enjoyable. If you’re able to make a reservation – Do it. If not, plan accordingly to make sure you’re on a walk-in waitlist. Once we were called in, we were so thankful to have secured a real table where we could take off our masks and enjoy a relaxing meal. Great food, highly recommend when you’re at Epcot.
The real winner
After lunch, we went to ride Nemo’s Undersea Adventure. Baby had fallen asleep during lunch, so husband volunteered to stay outside with her while toddler and I rode Nemo. While I can’t speak much to Nemo’s actual ride, the most incredible experience waits for you at the end. The ride ends in a giant aquarium where a greeter met us with a sticker-book scavenger hunt for my toddler to use as we explored the aquarium. It was definitely one of the highlights of my toddler’s day and also our entire trip! She couldn’t stop talking about the sea turtles and dolphins she saw at the aquarium! It also led to some explaining once we reunited with my husband and baby almost an hour later. Probably should have anticipated that better! We could have easily spent 2 hours in there.
We headed back to the hotel after Nemo to meet our arriving family. Even though we only rode 2 rides in almost 4 hours, passed on the “cool rides” like Test Track and Soarin, it was the best visit to Epcot I’ve ever had. I can’t wait to go back when the girls are a little older so we can spend the day and see the new evening watershow Epcot is planning to unveil next year.
Tips and Tricks: Snacks, Water, Sunscreen and Patience
Let’s go to Disney World!
The famous last words of any parent with good intentions. After cancelling our Thanksgiving plans to visit family “just to be safe,” we ended up throwing caution to the wind and planning a last minute trip to Disney World! So many things are crazy about that statement. The first being a last minute trip to Disney World where people plan for YEARS in advance, and the second… Disney World during a PANDEMIC. As generally over-cautious people, and as a family that has been rocked by 2020, it turned out that this was exactly what we needed. So in less than 4 days, our family plus the inlaws, planned a 5 day trip to the most magical place on Earth. I could not recommend it more!
Of course being me, I immediately went into panic-mode researching Disney with a baby and a toddler, pandemic travel, Disney pandemic rules, packing lists, reservations, must-do’s, snack strategies, and everything else you can imagine to best prepare us for this adventure. It had been almost a decade since I had been to Disney, and I was the “child” at the time – no planning or strategy for me! On “parent side,” I can assure you it gave me tremendous appreciation for my parents in how they made it appear so effortless. I found the following websites incredibly resourceful in my research: Undercover Tourist and Disney Food Blog.
What stroller should you bring to Disney?
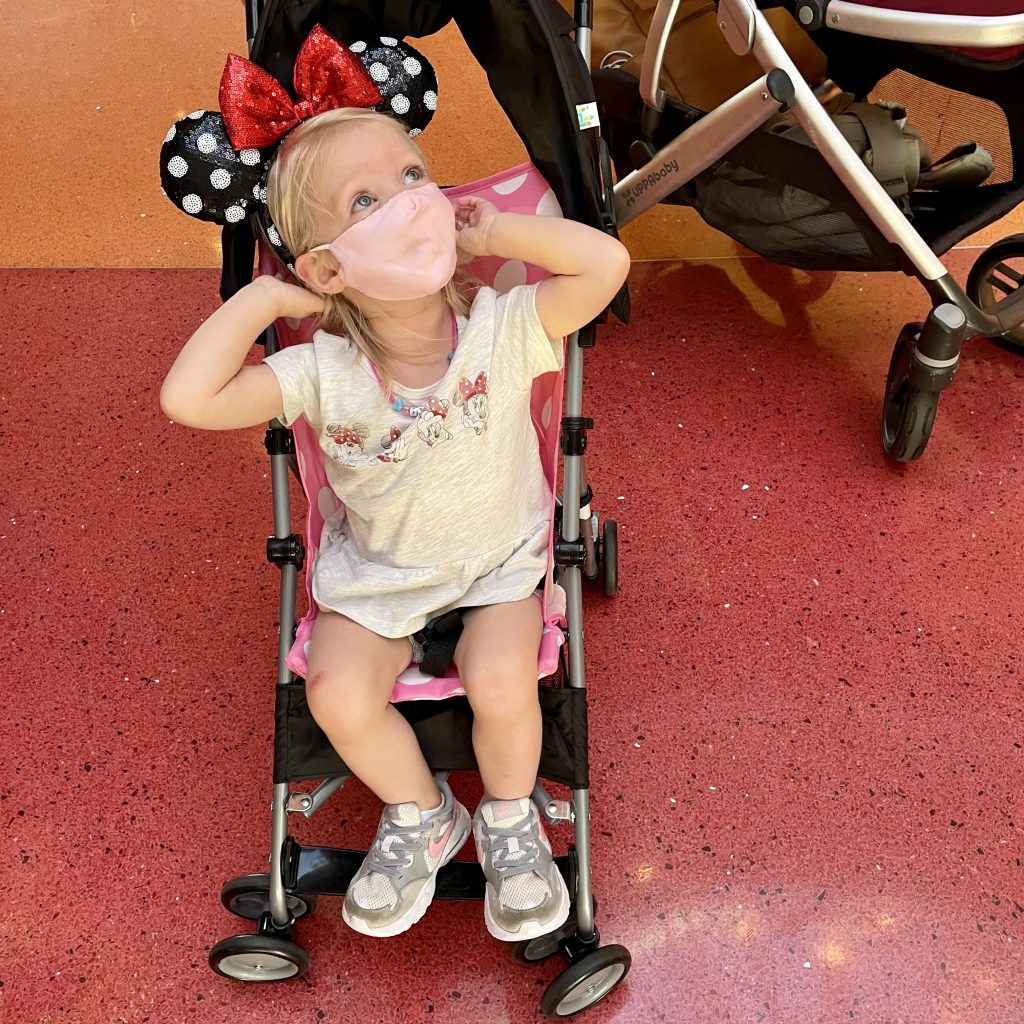
What I didn’t find in all of my research, and admittedly, it was probably incomplete based on the timing crunch, was a stroller analysis. And for all of you in the pre-parent stage of life, trust me, this is CRITICAL to how any parent experiences anything. Which stroller was best for Disney with a baby (pre-walking), and a 2 year old who loves to run but definitely can’t handle the speed or marathon that is Disney? I couldn’t find an answer or a breakdown of the pros & cons I was looking for. YES there are companies that rent out strollers to visitors. YES a double stroller was recommended as most helpful. YES you likely need a stroller for the toddler. For all of these statements, I found so many articles outlining the best companies to rent from, strategies on when and how to rent, where to park and how to find your stroller in the park, but not a BRAND, make, or model into which stroller I specifically needed. That’s the information I was missing, so I just brought what we had and let me tell you… this was a mistake.
We have an Uppababy Vista which I can very much say is the King of all strollers from an all-purpose child transport perspective. Easy to pop open and closed for your trunk, easy to pop in a carseat and even easier to convert to a double if you need to add a seat. The tires are indestructible and glide over almost anything and it has a huge basket to store your diaper bag and anything else you may need (e.g., souvenirs). I figured we were set for Disney, and with an ergobaby in the basket we would be ready for whatever came our way. WRONG.
Beware of the buses
If you take nothing else away from this post – the Vista is NOT the stroller you should bring to Disney. EVER. And it’s for one reason only – the buses. While the Vista has incredible qualities, what really made us regret our choice immediately was the inability for Vista to fold and remain “contained” with one hand while on a bus with two squirmy kids. It also requires that you take EVERYTHING out of the basket in order to be folded.
This was not something we anticipated. The bus system requires that prior to getting on the bus from the hotel to the park or Disney Springs that strollers be deconstructed and stay that way on the bus so that people can walk on. Very reasonable request and definitely their safety requirement, but in practice, I can say that we dreaded this exercise every time we approached the bus. Other Vista owners we observed had this same sentiment… total misery. It was a full person job (my husband) to breakdown the stroller, hold the diaper bag(s) and keep the stroller upright while the other person (me) to contain both kiddos. This is the only negative thing I can say about the Vista, but I can promise you, the experience was so impactful that we would never again bring a Vista (or anything like it) to Disney again. I can’t even imagine what would have happened had we decided to add our converters to make the Vista a double. We probably would have just left the stroller at the hotel to be honest. For what it’s worth, in 5 days, I saw ZERO double-converted Vistas.
The other negative was really more on us and not a fault of Vista. Our theory of being able to quickly pop a squirmy or sleeping baby in and out of the stroller into the ergo so that our toddler could ride was faulted. Probably not a surprise, but when you are trying to “run” across Animal Kingdom from Africa to Pandora, 3 minutes to switch everyone around is a LONG time. The other option of carrying a 30 lb toddler for a mile is also not great either – although it is a great workout! I’ll just say that after Day 1, we caved and bought a cheap Minnie Mouse umbrella stroller in the hotel gift shop to stow in the Vista basket so we could zoom our toddler around when needed.
The stroller you need at Disney
All this is not said without a solution. I have it. I witnessed it. My sister-in-law HAD IT. Let me introduce the Uppababy G-Link Double Stroller. I literally have never envied something so much in my life. The ease at which they were able to navigate the bus situation, parks, naps, snacks, and everything with twin one-year olds was incredible. And it was all due to this stroller. I do not exaggerate.
This stroller was able to break-down with one hand, lock and get carried in with one hand in less than 2 seconds. A key piece of this break-down design as well are the storage bags. Instead of a massive open basket like the Vista, the G-Link has 2 storage bags that close shut. This is essential because it also eliminates the need for a giant park bag to hold all of your snacks and you don’t have to worry about things falling out when you break it down to carry in the bus. Let me also just comment that the seats recline individually. My toddler was able to hop in here to zoom around while next to a reclined sleeping baby. This is what you need. It’s worth double what it costs. Trust me.
Also a comment on the wheels because this is important. While my husband battled getting stuck wheels in the trolley tracks throughout the parks with our aforementioned gift shop stroller, my sister-in-law was able to just glide easily over.
Disney is stressful enough when you are trying to navigate the happiest place on earth while on the constant brink of toddler euphoria and epic meltdown. Buy this stroller. Bring it to Disney. Live the fantasy.