this is a page for
Category: Savory Recipes
‘Tis the Season
(scroll to the end for recipe)
National BBQ Day was the other day. One of those ambiguous days that you see on insta or FB that reminds you to post a fun picture to “commemorate the day.” That being said, it’s starting to be that time of year when we are regularly up at dawn putting something on our smoker, and yesterday was one of our first days of the season to fire it up. That’s actually not true given we use our smoker all year (including in snow), but there is something very different once summer starts to come around. As such, here is my celebration, a little late, of BBQ. In this case, technically, it’s a celebration of our smoker of choice, the Traeger. If you don’t have one, feel free to connect with me and I’ll be happy to sell you on it.
BBQ is one of those food groups that isn’t plentiful up here in the Mile High, so my husband and I have had to improvise and figure it out ourselves to recreate the delicious smoked meats we love to indulge on. Enter, the Traeger. We received one as a housewarming gift when we bought our house a few years ago, and it is easily one of our most favorite things. It makes cooking so easy, and makes the most amazing, show-stopping meals. We smoke literally everything minus fajitas and steaks. We have tried, and while they are delicious, I just prefer those dishes without the smokiness – personal preference. When exploring recipes, especially with a new cut of meat, I always turn to those specifically from Traeger. There are so many to choose from, just look for the high ratings, flavor profile, and effort level (low please!) you are looking for.
That’s how I found my favorite recipe for Pulled Pork. It’s one of our favorite things to make for several reasons which include: it’s CHEAP, easy, delicious, and the leftovers can be transformed into many different dishes so you aren’t eating the “same thing” for a week. This is key for my family as my husband doesn’t love to eat the same thing multiple meals in a row – aka. Leftovers. You do need to plan for this recipe as total time averages around 10 hours, but I promise it’s worth it.
Life Mantra: Low Effort, High Impact
From a cooking standpoint, smoking meat is easy. While the timing varies, the key is temperature. When you look up recipes, the timelines vary based on weight, altitude, outside temperature, etc, but they are all centered around the temperature of the meat you are cooking. I cannot stress enough – this is key. The new smokers have the gauges set to wifi, so you can check the meat temperature AND adjust the smoking temperature from your phone. This is a FABULOUS feature on the newer editions, and I would definitely pay extra for it. While ours doesn’t have it, it would make things even easier to not have to go outside every so often (sometimes in the rain, snow, etc) to check on meat temp. First world problems, I know. But it ALSO would be nice, if you’re smoking a brisket for example which requires almost 24 hours, to not to have to get out of bed in the middle of the night to check on it. Just saying. I would also consider investing in a thermometer probe that connects to your machine. Most new smokers come with one or two of these, but if they don’t, buy one. For an incremental, minimal cost it will make your life (and your food) much better.
Tips
These are my key TIPS when making pulled pork:
- As long as it is a BBQ style spice mix, the type of rub you use to season the meat doesn’t really matter here. Only that it is applied liberally on all sides. Even if you transform this dish to Green Chili Pork (my personal favorite), BBQ seasoning is perfect.
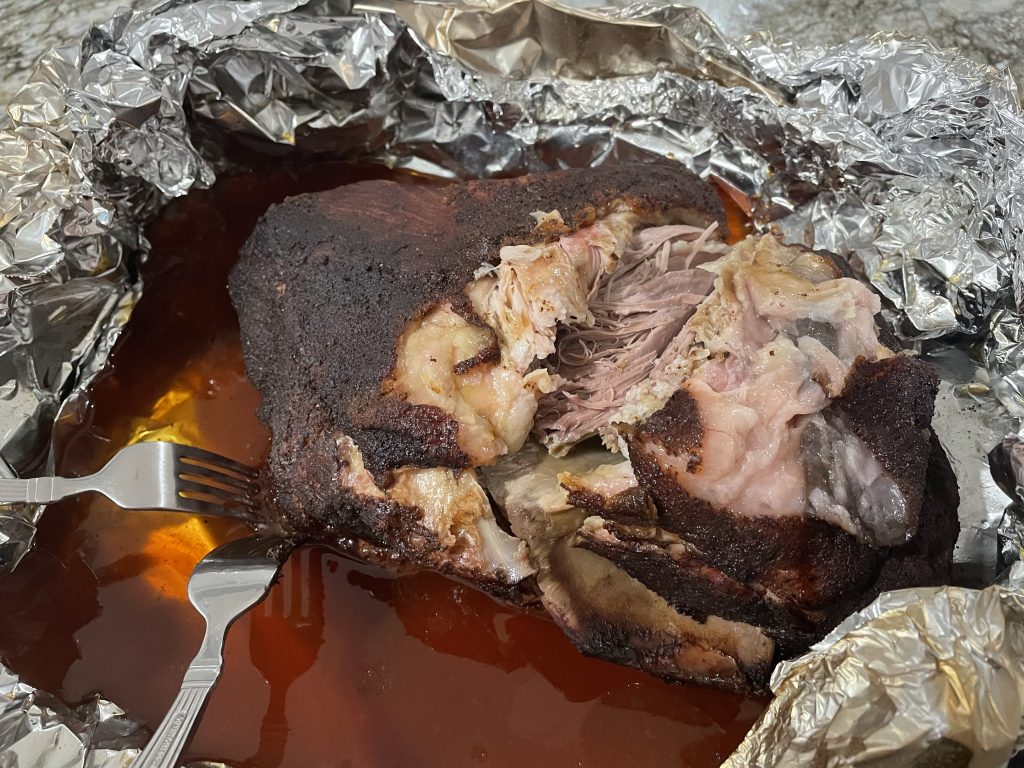
- This recipe only requires one “extra” step outside of putting the meat in the smoker. When the time comes to wrap the pork, use extra long, durable foil, and make it Reynolds. Brand matters when it comes to foil, trust me on this. You do not want flimsy foil when you need to support almost 10 lbs of meat and liquid. Prepare the foil ahead of time – I recommend using a sheet pan to first lay out 2 LONG layers of foil lengthwise, then 2 additional layers of foil horizontal. It should look like a plus sign. Gently press into the sheet pan so there is a well where the pork and juice can sit without leaking.
- Let’s talk about the STALL. What I have discovered is that certain cuts of meat (particularly at high altitude) experience what is called a cooking stall. Pork shoulder has reliably been one of those meats for us. What it means is that it stalls at a certain temperature for a LONG time. Typically right as you are waiting for a next step or to pull the meat off. For us, we have noticed that this cut typically stalls around 196 degrees which is just short of the recommended finished cooking temperature. While there are many ways to push through the stall (thank you Aaron Franklin for your Brisket Masterclass), the easiest for me is to crank up the heat a little to try and push through. For us, we go up to 350 and watch closely to ensure the pork doesn’t overcook. We have also lost patience (many times) in this process and pulled the meat at 200 (instead of 204) and it is still perfect once it finishes it’s rest period.
- When it comes time to shred your pork, I recommend preparing a station. This makes cleanup and your shred quality much better. When you pull the pork, I recommend letting it rest in the same sheet pan you prepared the foil in. This ensures no juice will leak onto your counter surface. After resting for an hour, gather a large cutting board, and a large bowl or serving platter, and 2 forks. When you open the packet, I start by lightly scraping off any excess fat with the flat side of a fork. This slides right off. Then I remove the bone and let it lay in the packet. Working in small chunks, I just fork off sections of the pork onto my cutting board and shred small pieces at a time. I don’t love extra fat (personal preference), so as I shred, I put excess fat pieces back into the foil packet and only perfect components into my serving dish. This ensures manageable shred quantities, perfect bites, and keeps scraps and trash contained within the foil packet. For a cooked 9 lb pork shoulder, this process typically takes me 30 min.
- For serving, if we have made this for a party, I love to serve it up family style on a big platter for people to help themselves! Serve it with an assortment of BBQ sauces, pickles, variety of sliced cheeses, buns, etc. to make it fun, delicious and EASY. While Headcountry’s Original BBQ Sauce will always be our traditional favorite, last year, we grabbed a bottle of Lillie’s Gold barbeque sauce on a whim and now it’s a must serve whenever we make this. I love the vinegary tang of it.
Now for the Recipe!
Easy Peasy Smoked Pulled Pork
Ingredients:
- 1 (6-9 lb) bone-in pork shoulder
- 2 cups apple cider
- Preferred BBQ Spice Rub
Instructions:
- Set smoker temp to 250 and preheat, lid closed, for 15 min.
- While smoker preheats, trim excess fat from pork butt and season LIBERALLY on all sides. Let sit for 20 min. This is when I recommend placing the temperature probe in as well. Make sure it is not touching the bone and is going through the center of the meat (not down from the top)
- Place the pork butt fat side up directly on the grill and cook for 3 to 5 hours or until the internal temperature reaches 160.
- While the pork cooks, prepare the foil packet. See the key info above, but stack 4 strips of foil onto a baking sheet ensuring they are long enough to wrap around the pork butt. Press along the sides inside the baking sheet to create a large well.
- Unplug the temperature probe (if using) from the trager, and move the pork butt onto the foil in the center of the well. Gently pour the apple cider over the top of the pork butt, then gently wrap the foil around the pork (bring each side together and roll down the edges) being careful not to let the apple cider leak out and be mindful of the probe.
- Place the foil wrapped pork back on the grill (still fat side up) and cook 3 to 4 hours longer or until the internal temperature reaches 204.
- Remove from the smoker and allow it to rest in the foil packet for 45 min to an hour.
- Shred and Enjoy! See Tips above for my shredding method. The original recipe calls to add back the strained cooking liquid to the meat. I have never done this, but I’m sure it’s delicious.
For those of you Texans who have had the pleasure of dining at Roaring Fork. There is no doubt that you have had a steaming individual cauldron of green chili pork stew with melty cheese and buttered tortillas. I didn’t know buttered tortillas were a thing, but I promise you, they are essential.
Creature of Habit
This dish is now the only thing I can order whenever I go to Austin. Typically with a side of green chili mac since I can’t help myself. While there are many other incredible things on the menu, there is something truly special about the green chili pork stew. As fate would have it, I ended up moving to the home of the namesake of this amazing restaurant – the Roaring Fork River and have been trying to emulate this recipe ever since. To be honest, I tried a few times in Houston just because I missed it.
The Secret is Out
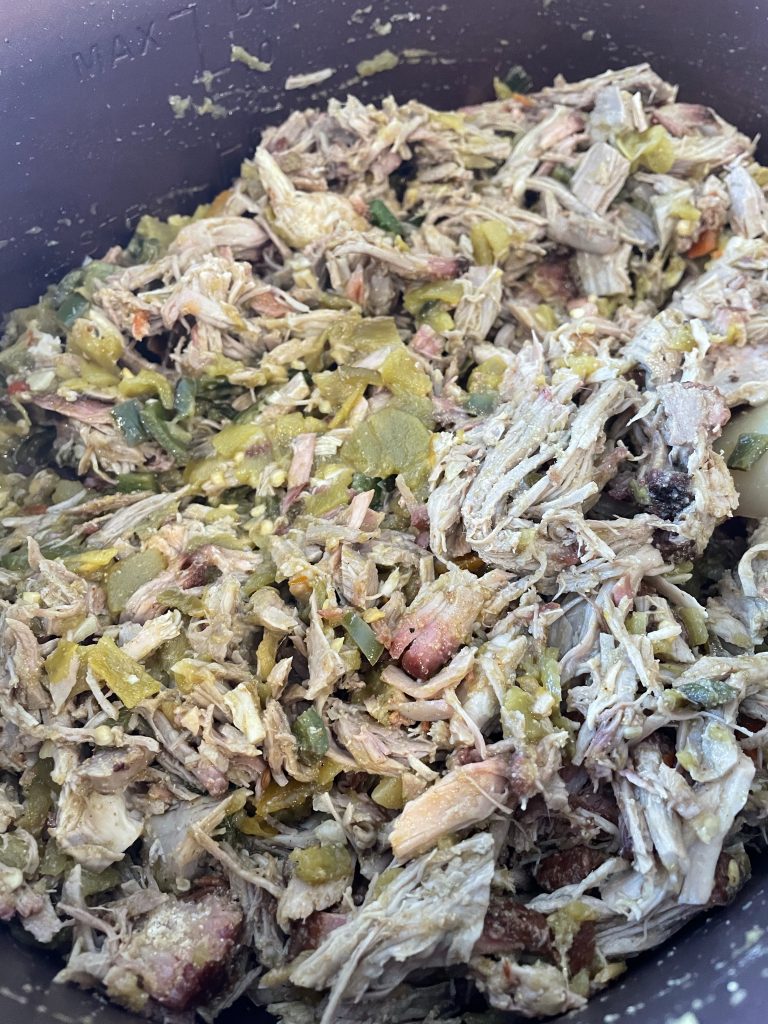
Another recipe I’ll be sharing soon is our pulled pork. After moving into our house, we received a Traeger smoker as a housewarming gift and it has become one of our most beloved items. I truly believe if the house caught fire the traeger would be the first thing my husband tried to save after our girls and pup. I think this is the start of the secret to our perfect green chili pork stew. Admittedly, I fell into this recipe by trying to figure out what to do with several pounds of leftover pulled pork that I didn’t want to put on another BBQ sandwich. Enter, stew as one of my favorite ways to use pulled pork. I would even (and have) made pulled pork just as an excuse to make this stew.

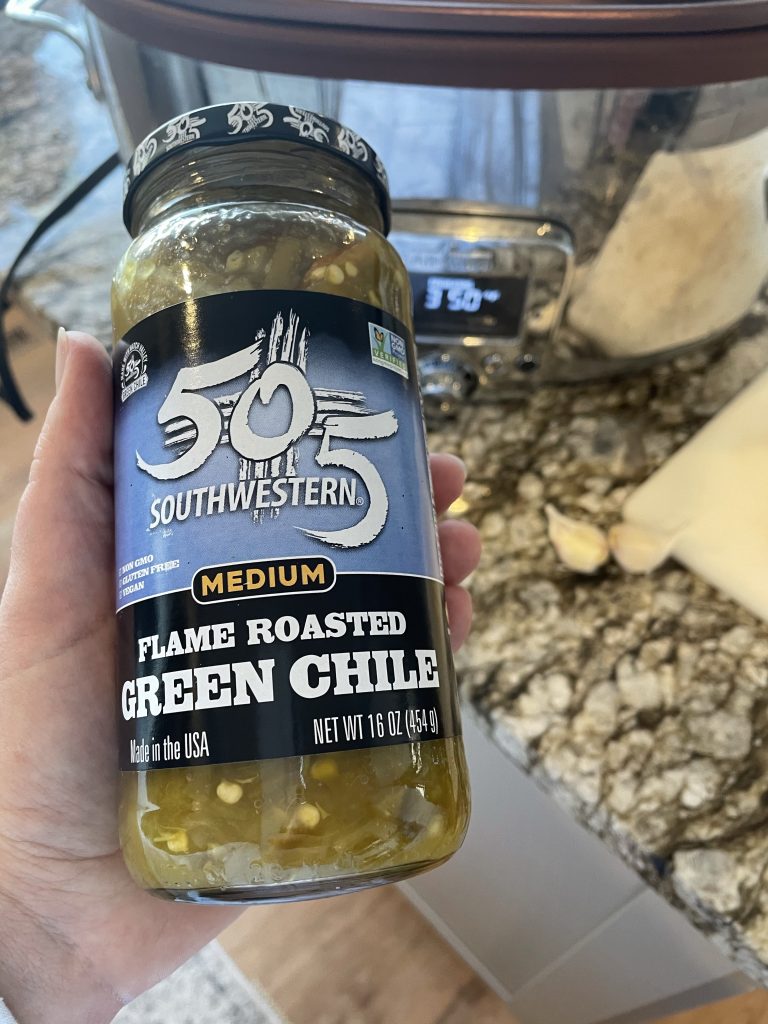
My other secret, a jar of 505 green chilis. While I love good food and to cook (sometimes), I hate prep and I am scrapped for time. This includes the lack of time to fire roast and peel my own green chilis. I’ll also note that in several recipes I’ve found online claiming to have the secret to Roaring Fork’s stew that they use green chili POWDER. This seems blasphemous to me, which led me to the search for the best alternative. I promise you this brand does not disappoint. The flavor is perfect, the consistency is exactly as if you roasted and chopped your own, and best of all…. No powder. Not sponsored, just a perfect product.

Outside of that, everything else is as simple and tossing it in the slow cooker and letting it work it’s magic. Small clarification, your slow cooker matters. I’m obsessed with our All-Clad slow cooker which browns AND slow cooks in the same pot. Not only does this make my life easier, but it also reduces the amount of dishes you have to do! If you know me, you know one thing, I hate cleaning. I wish I was one of those people who were OCD about cleaning, but I’m not.
I’ll also note that any recipe that calls for jalapenos, I take the seeds out. We are spice sissys in this family, and can’t handle the seeds. Obviously, if you are not on that spectrum, go wild.
Texas Tundra
I can’t help but think of my family and friends right now in Texas as they navigate a truly historical cold front and the hardships that are coming with it. As I look out of my sunny window at no snow, I think on the pictures from friends and family in Austin where their neighbors are literally SKIING down the street, and battling no power, water and many with busted pipes. It feels backwards to say the least. Texas is not built for tundra. It can handle many things, but an arctic blast is out of the realm. When my husband and I look at the forecast and see chilly weather ahead, this is what we plan for to see us through some indoor, blanket days.
(The Best Ever) Roaring Fork’s Green Chili Pork Stew Recipe
- 2 lbs pulled pork, shredded or diced (see Note 1)
- 1 yellow onion, diced
- 1 jalapeno pepper, seeded and diced (2 if you are feeling wild)
- 1 poblano pepper, diced
- 2 – 4 cloves garlic, minced
- 16 oz Fire Roasted Green Chiles (Favorite: 505 Southwestern)
- 2 TB ground cumin
- 2 TB ground coriander
- 2 TB onion powder
- 1 TB garlic powder
- 1/4 cup flour
- 2 – 4 cups chicken stock or enough to cover the pork and veggie mixture
- 2 TB olive oil
- salt and pepper to taste
- Shredded monterey jack cheese
- flour tortillas
Instructions:
Note 1: If you don’t have pulled pork on hand, dice up 2 pounds of pork shoulder. Season liberally with half of the spice mixture, and set your slow cooker to “BROWN” or turn a skillet onto med high heat. Brown all sides of the pork roughly 2-3 min per side. Once brown, remove to rest on a plate and wait for Step 2.
- With your slow cooker set to brown, toss in the onion, jalapeno, and poblano to saute until softened in 2 TB of olive oil. If you don’t have a slow cooker with this setting, just use a skillet for the same effect then transfer into slow cooker.
- Once softened, turn slow cooker to “SLOW low” and toss in garlic for 1 min, then the jar of green chiles and the pork.
- After a quick toss, add in the spices and the flour and stir to evenly coat.
- Once coated, pour in the chicken stock to cover the mixture completely. You can adjust depending on how stewy vs. soupy you prefer your outcome to be. I like it to be on the stewy side.
- Let cook on the low temperature setting for 4-8 hours. Everything is already cooked, you’re just looking for a perfect blend of flavors and thickening of the sauce. I’ve pulled this both after 4 and 8 hrs with excellent results. Just watch the liquid level if going to 8.
- Serve with buttered tortillas or over rice/quinoa with plenty of monterrey jack cheese.

